Appearance
教程:使用语言模型 API 生成 AI 驱动的代码注释
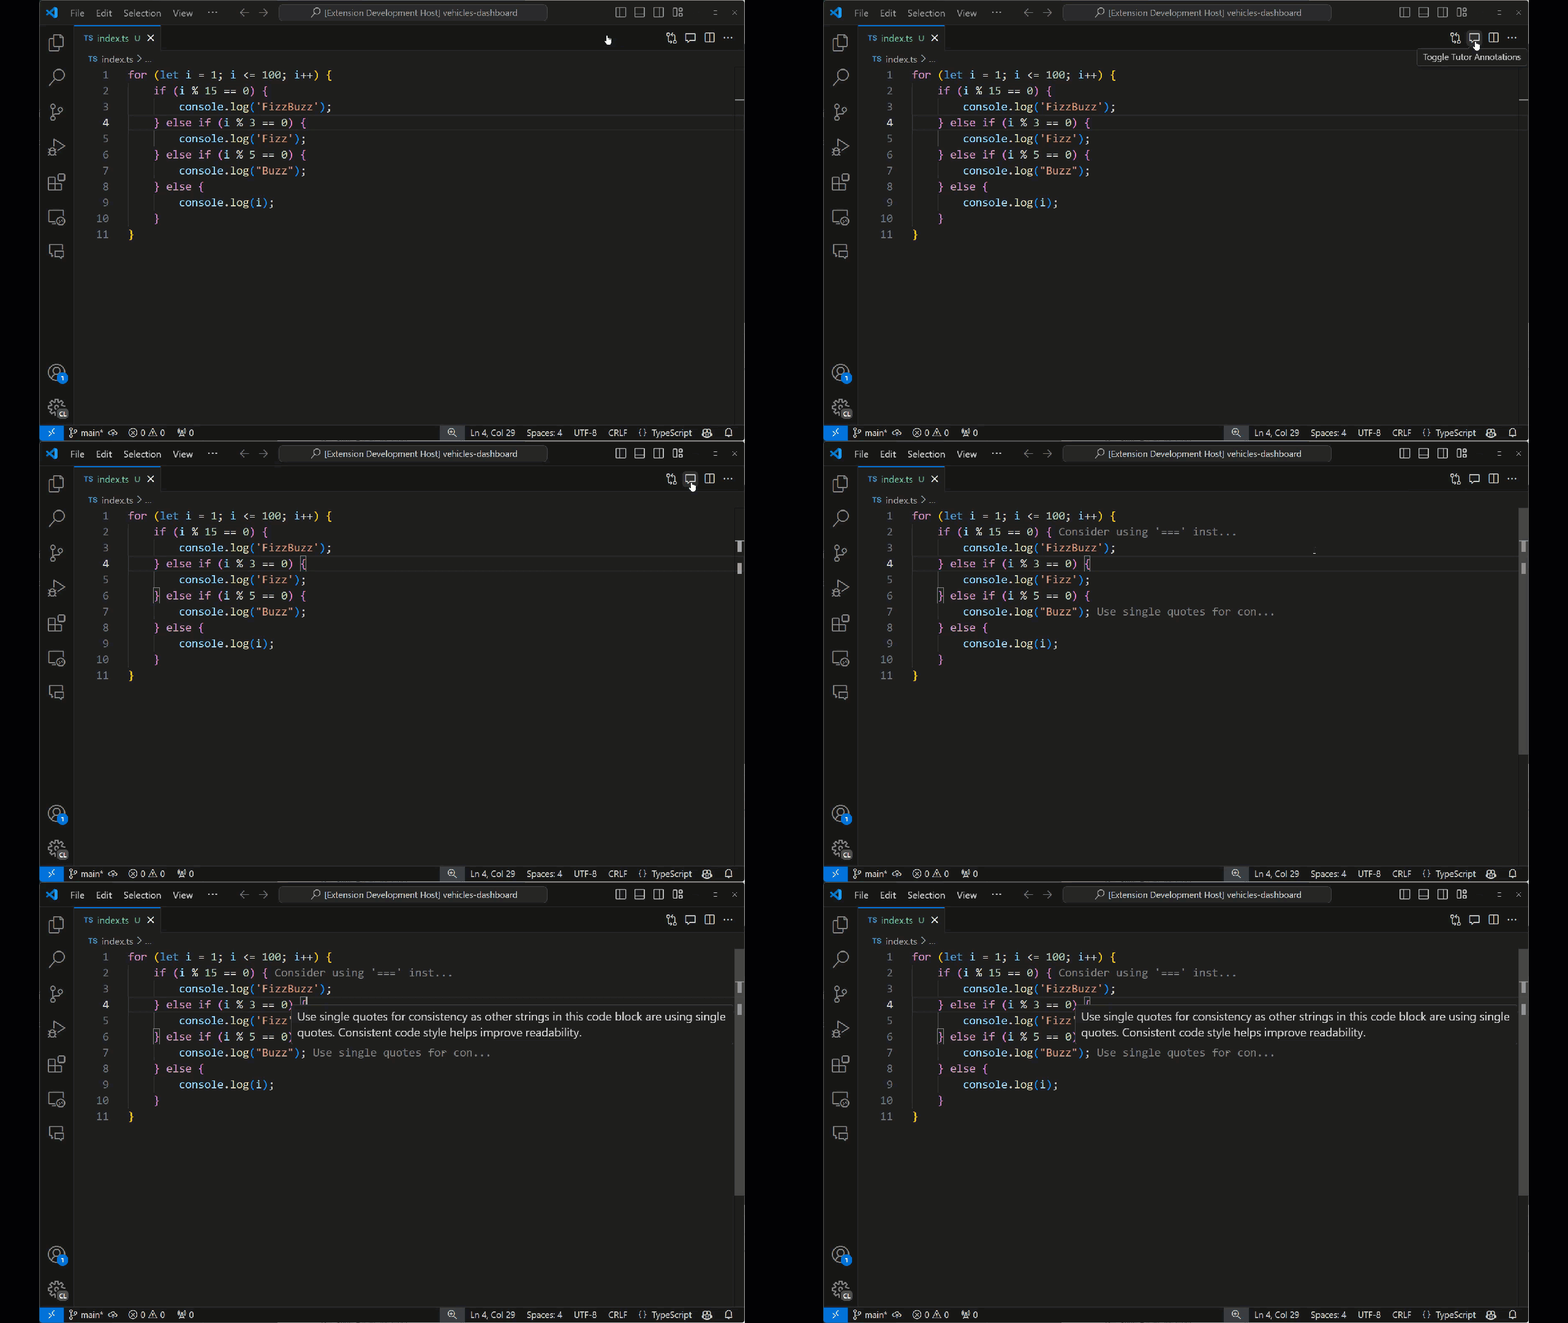
本教程将介绍如何创建 VS Code 插件以构建 AI 驱动的代码导师。你将使用语言模型(LM)API 生成改进代码的建议,并利用 VS Code 插件 API 将其无缝集成为编辑器中的内联注释,用户可悬停注释获取更多信息。完成本教程后,你将了解如何在 VS Code 中实现自定义 AI 功能。
先决条件
完成本教程需要以下工具和帐户:
搭建插件脚手架
首先,使用 Yeoman 和 VS Code 插件生成器搭建可开始开发的 TypeScript 或 JavaScript 项目。
bash
npx --package yo --package generator-code -- yo code选择以下选项完成新扩展向导:
bash
# ? What type of extension do you want to create? New Extension (TypeScript)
# ? What's the name of your extension? Code Tutor

### Press <Enter> to choose default for all options below ###

# ? What's the identifier of your extension? code-tutor
# ? What's the description of your extension? LEAVE BLANK
# ? Initialize a git repository? Yes
# ? Bundle the source code with webpack? No
# ? Which package manager to use? npm

# ? Do you want to open the new folder with Visual Studio Code? Open with `code`
修改 package.json 文件以包含正确的命令
脚手架项目在 package.json 文件中包含单个“helloWorld”命令。安装插件后,该命令会显示在命令面板中。
json
"contributes": {
  "commands": [
      {
      "command": "code-tutor.helloWorld",
      "title": "Hello World"
      }
  ]
}
由于要构建会为行添加注释的代码导师插件,因此需要一个命令让用户切换注释的显示状态。请更新 command 和 title 属性:
json
"contributes": {
  "commands": [
      {
      "command": "code-tutor.annotate",
      "title": "Toggle Tutor Annotations"
      }
  ]
}
package.json 定义插件的命令和 UI 元素,而 src/extension.ts 文件则用于放置执行这些命令的代码。
打开 src/extension.ts 文件并修改 registerCommand 方法,使其与 package.json 文件中的 command 属性匹配。
ts
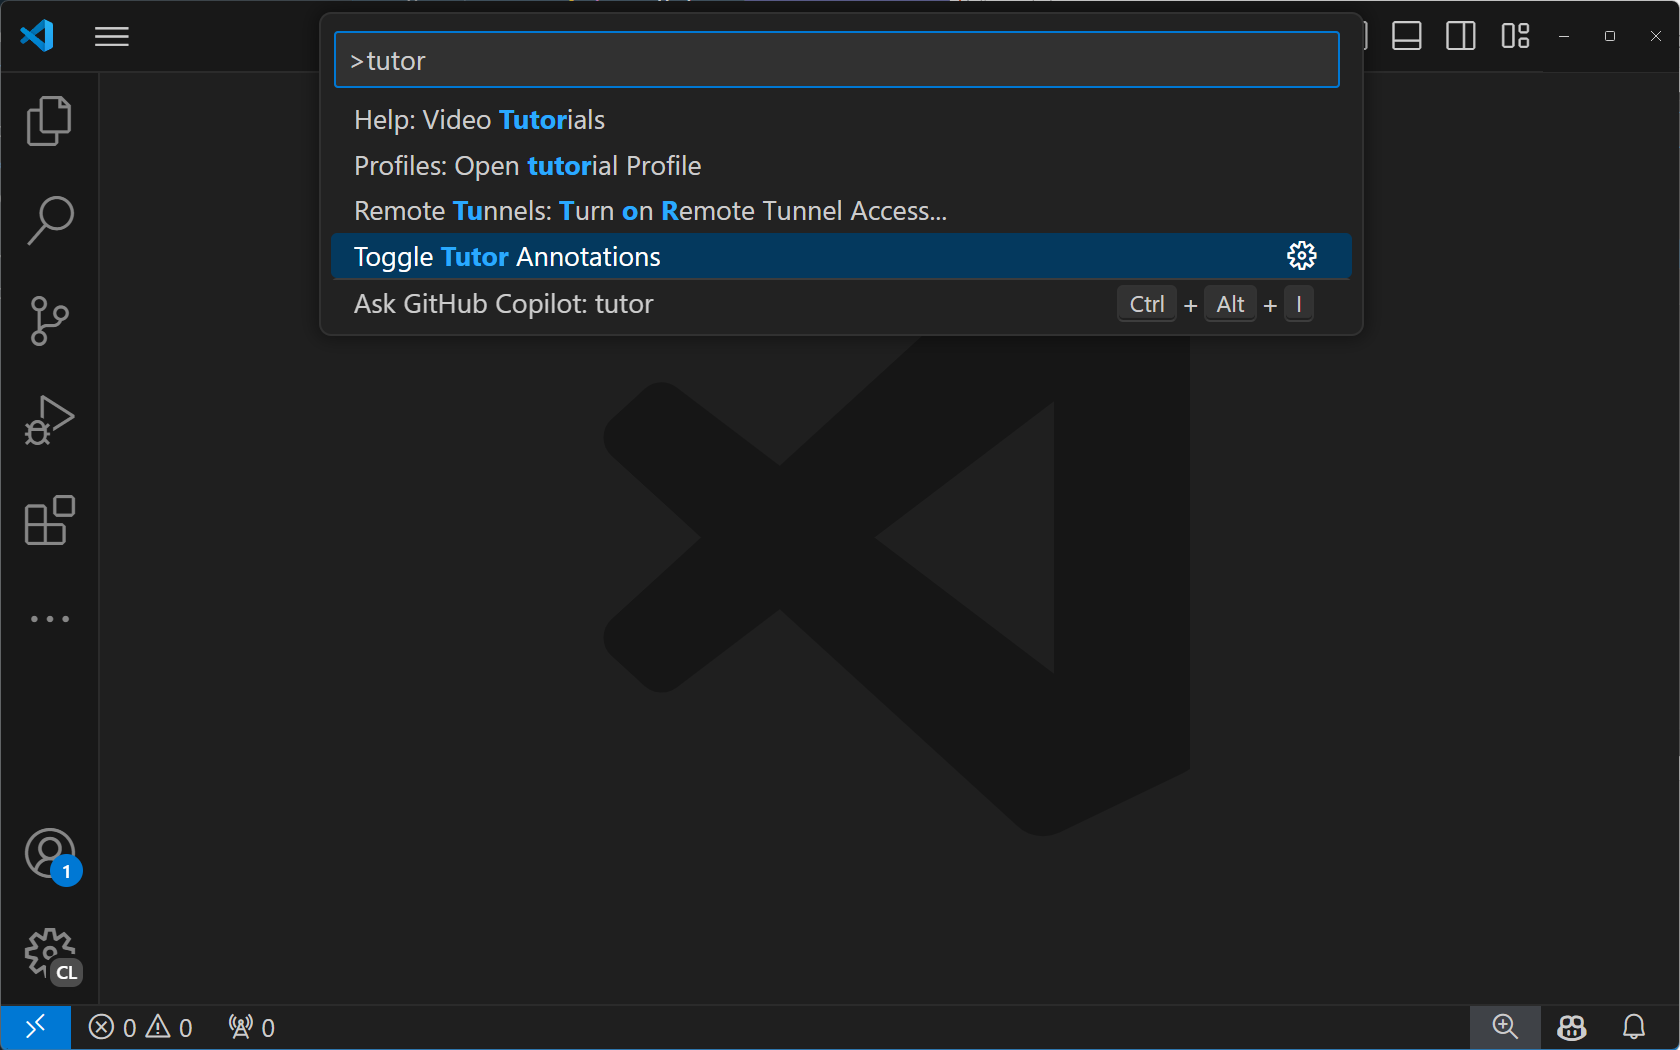
const disposable = vscode.commands.registerCommand('code-tutor.annotate', () => {按 kbstyle(F5) 运行插件。这将打开安装了该插件的新 VS Code 实例。按 kb(workbench.action.showCommands) 打开命令面板,并搜索 “tutor”。应能看到 “Tutor Annotations” 命令。
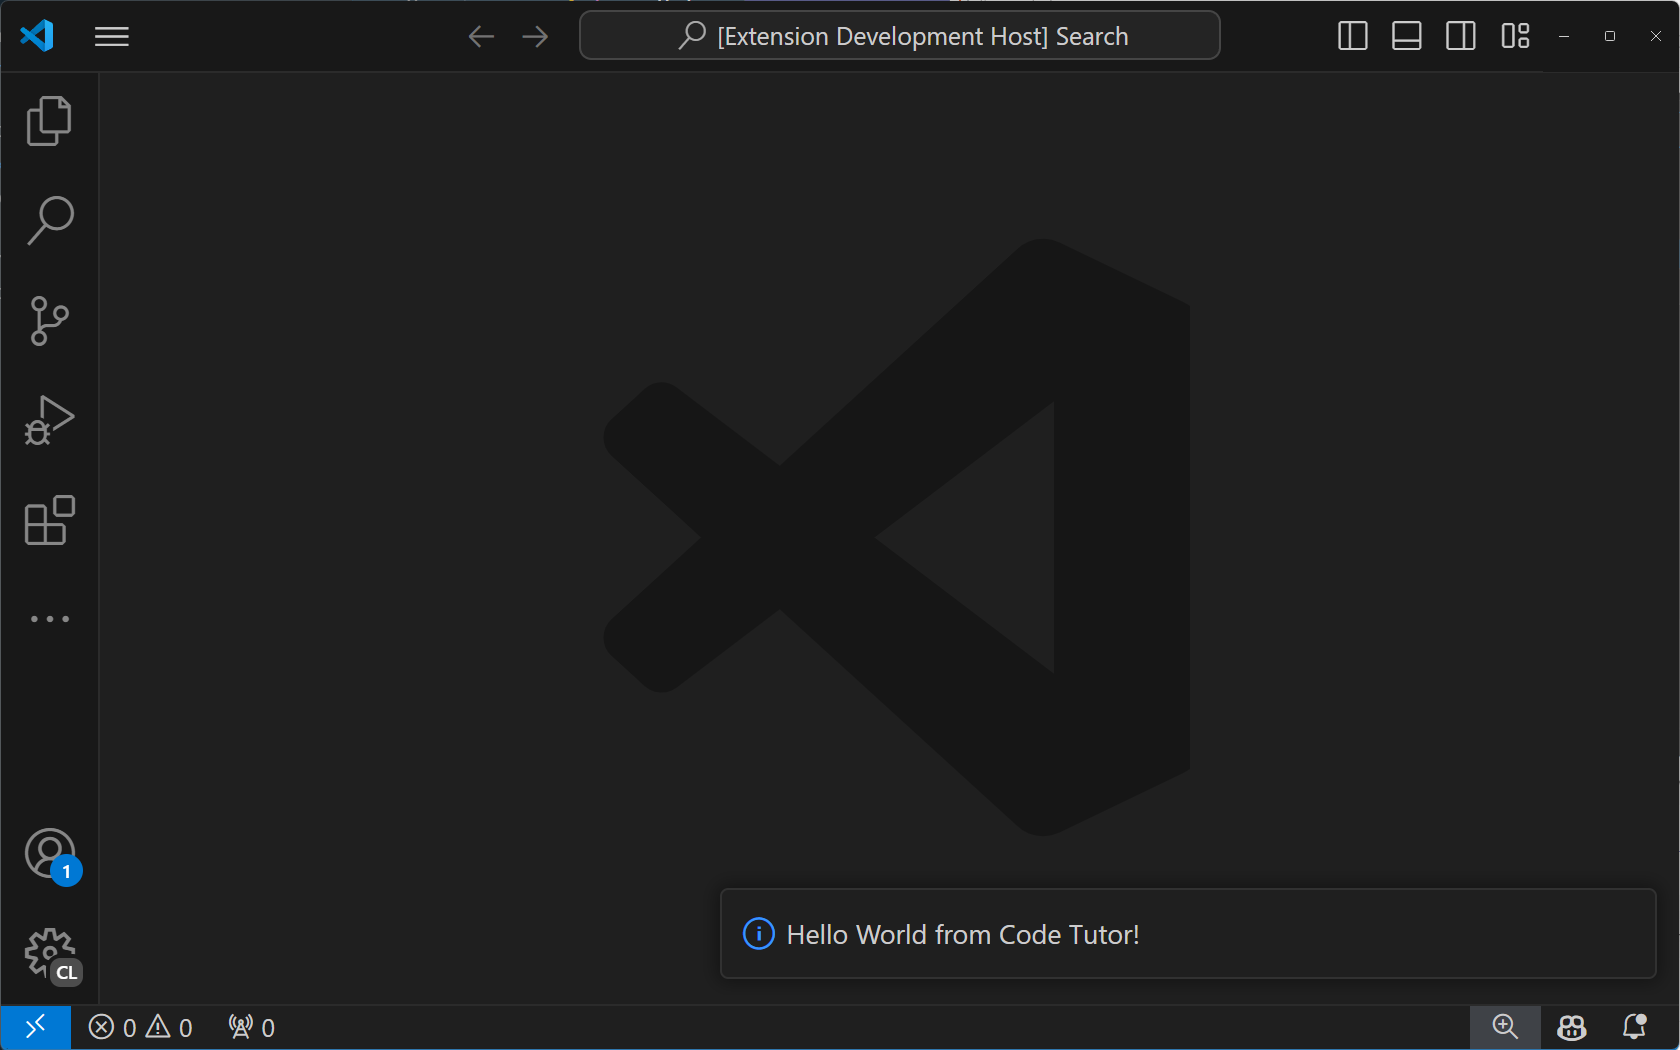
选择 “Tutor Annotations” 命令后,将看到 “Hello World” 通知消息。
实现“annotate”命令
要使代码导师注释生效,需要向其发送代码并要求它提供注释。分以下三步完成:
- 从用户当前打开的选项卡中获取带行号的代码。
- 将代码连同自定义提示发送给语言模型 API,提示应指导模型如何提供注释。
- 解析注释并在编辑器中显示。
第 1 步:获取带行号的代码
要获取当前选项卡中的代码,需要引用用户打开的选项卡。可将 registerCommand 方法改为 registerTextEditorCommand 来获取。两者的区别是后者会提供对用户打开选项卡的引用,即 TextEditor。
ts
const disposable = vscode.commands.registerTextEditorCommand('code-tutor.annotate', async (textEditor: vscode.TextEditor) => {现在可以使用 textEditor 引用获取“可见编辑器区域”中的全部代码。这些是屏幕上可见的代码,不包括可见编辑器区域上方或下方的代码。
将以下方法直接添加到 extension.ts 文件底部 export function deactivate() { } 行的上方。
ts
function getVisibleCodeWithLineNumbers(textEditor: vscode.TextEditor) {
  // get the position of the first and last visible lines
  let currentLine = textEditor.visibleRanges[0].start.line;
  const endLine = textEditor.visibleRanges[0].end.line;

  let code = '';

  // get the text from the line at the current position.
  // The line number is 0-based, so we add 1 to it to make it 1-based.
  while (currentLine < endLine) {
    code += `${currentLine + 1}: ${textEditor.document.lineAt(currentLine).text} \n`;
    // move to the next line position
    currentLine++;
  }
  return code;
}
此代码使用 TextEditor 的 visibleRanges 属性获取编辑器中当前可见行的位置。随后从第一行位置遍历到最后一行位置,将每行代码及其行号添加到字符串中。最后返回包含全部可见代码及其行号的字符串。
现在可以从 code-tutor.annotate 命令调用此方法。请将命令实现修改为以下形式:
ts
const disposable = vscode.commands.registerTextEditorCommand('code-tutor.annotate', async (textEditor: vscode.TextEditor) => {

  // Get the code with line numbers from the current editor
  const codeWithLineNumbers = getVisibleCodeWithLineNumbers(textEditor);

});
第 2 步:向语言模型 API 发送代码和提示
下一步是调用 GitHub Copilot 语言模型,向其发送用户代码以及创建注释的说明。
为此,首先需要指定要使用的聊天模型。这里选择 4o,因为它对于正在构建的交互而言既快速又有能力。
ts
const disposable = vscode.commands.registerTextEditorCommand('code-tutor.annotate', async (textEditor: vscode.TextEditor) => {

  // Get the code with line numbers from the current editor
  const codeWithLineNumbers = getVisibleCodeWithLineNumbers(textEditor);

  // select the 4o chat model
  let [model] = await vscode.lm.selectChatModels({
    vendor: 'copilot',
    family: 'gpt-4o',
  });
});
需要向模型提供说明,即“提示”,告知它创建注释以及期望的响应格式。将以下代码添加到文件顶部、导入语句的正下方。
ts
const ANNOTATION_PROMPT = `You are a code tutor who helps students learn how to write better code. Your job is to evaluate a block of code that the user gives you and then annotate any lines that could be improved with a brief suggestion and the reason why you are making that suggestion. Only make suggestions when you feel the severity is enough that it will impact the readability and maintainability of the code. Be friendly with your suggestions and remember that these are students so they need gentle guidance. Format each suggestion as a single JSON object. It is not necessary to wrap your response in triple backticks. Here is an example of what your response should look like:

{ "line": 1, "suggestion": "I think you should use a for loop instead of a while loop. A for loop is more concise and easier to read." }{ "line": 12, "suggestion": "I think you should use a for loop instead of a while loop. A for loop is more concise and easier to read." }
`;
这是一个特殊提示,用于指导语言模型如何生成注释。它还包含模型应如何格式化响应的示例。这些示例也称为“多样本(multi-shot)”,使我们能够定义响应格式,从而解析并将其显示为注释。
我们通过数组向模型传递消息。该数组可以包含任意数量的消息。在本例中,它包含提示,随后是带行号的用户代码。
ts
const disposable = vscode.commands.registerTextEditorCommand('code-tutor.annotate', async (textEditor: vscode.TextEditor) => {

  // Get the code with line numbers from the current editor
  const codeWithLineNumbers = getVisibleCodeWithLineNumbers(textEditor);

  // select the 4o chat model
  let [model] = await vscode.lm.selectChatModels({
    vendor: 'copilot',
    family: 'gpt-4o',
  });

  // init the chat message
  const messages = [
    vscode.LanguageModelChatMessage.User(ANNOTATION_PROMPT),
    vscode.LanguageModelChatMessage.User(codeWithLineNumbers),
  ];
});
要向模型发送消息,首先需要确保所选模型可用。这会处理插件尚未准备好或用户未登录 GitHub Copilot 的情况。然后将消息发送给模型。
ts
const disposable = vscode.commands.registerTextEditorCommand('code-tutor.annotate', async (textEditor: vscode.TextEditor) => {

  // Get the code with line numbers from the current editor
  const codeWithLineNumbers = getVisibleCodeWithLineNumbers(textEditor);

  // select the 4o chat model
  let [model] = await vscode.lm.selectChatModels({
    vendor: 'copilot',
    family: 'gpt-4o',
  });

  // init the chat message
  const messages = [
    vscode.LanguageModelChatMessage.User(ANNOTATION_PROMPT),
    vscode.LanguageModelChatMessage.User(codeWithLineNumbers),
  ];

  // make sure the model is available
  if (model) {

    // send the messages array to the model and get the response
    let chatResponse = await model.sendRequest(messages, {}, new vscode.CancellationTokenSource().token);

    // handle chat response
    await parseChatResponse(chatResponse, textEditor);
  }
});
聊天响应以片段形式到达。这些片段通常包含单个单词,但有时只包含标点。为了在响应流入时显示注释,需要等到获得完整注释后再显示。根据对模型返回响应方式的指示,当看到闭合 } 时,就说明获得了完整注释。随后可以解析注释并在编辑器中显示。
将缺失的 parseChatResponse 函数添加到 extension.ts 文件中 getVisibleCodeWithLineNumbers 方法的上方。
ts
async function parseChatResponse(chatResponse: vscode.LanguageModelChatResponse, textEditor: vscode.TextEditor) {
 let accumulatedResponse = "";

 for await (const fragment of chatResponse.text) {
  accumulatedResponse += fragment;

  // if the fragment is a }, we can try to parse the whole line
  if (fragment.includes("}")) {
   try {
    const annotation = JSON.parse(accumulatedResponse);
    applyDecoration(textEditor, annotation.line, annotation.suggestion);
    // reset the accumulator for the next line
    accumulatedResponse = "";
   }
   catch (e) {
    // do nothing
   }
  }
 }
}
还需要最后一个方法来实际显示注释。VS Code 将其称为“装饰”。将以下方法添加到 extension.ts 文件中 parseChatResponse 方法的上方。
ts
function applyDecoration(editor: vscode.TextEditor, line: number, suggestion: string) {

 const decorationType = vscode.window.createTextEditorDecorationType({
  after: {
   contentText: ` ${suggestion.substring(0, 25) + "..."}`,
   color: "grey",
  },
 });

 // get the end of the line with the specified line number
 const lineLength = editor.document.lineAt(line - 1).text.length;
 const range = new vscode.Range(
  new vscode.Position(line - 1, lineLength),
  new vscode.Position(line - 1, lineLength),
 );

 const decoration = { range: range, hoverMessage: suggestion };

 vscode.window.activeTextEditor?.setDecorations(decorationType, [
  decoration,
 ]);
}
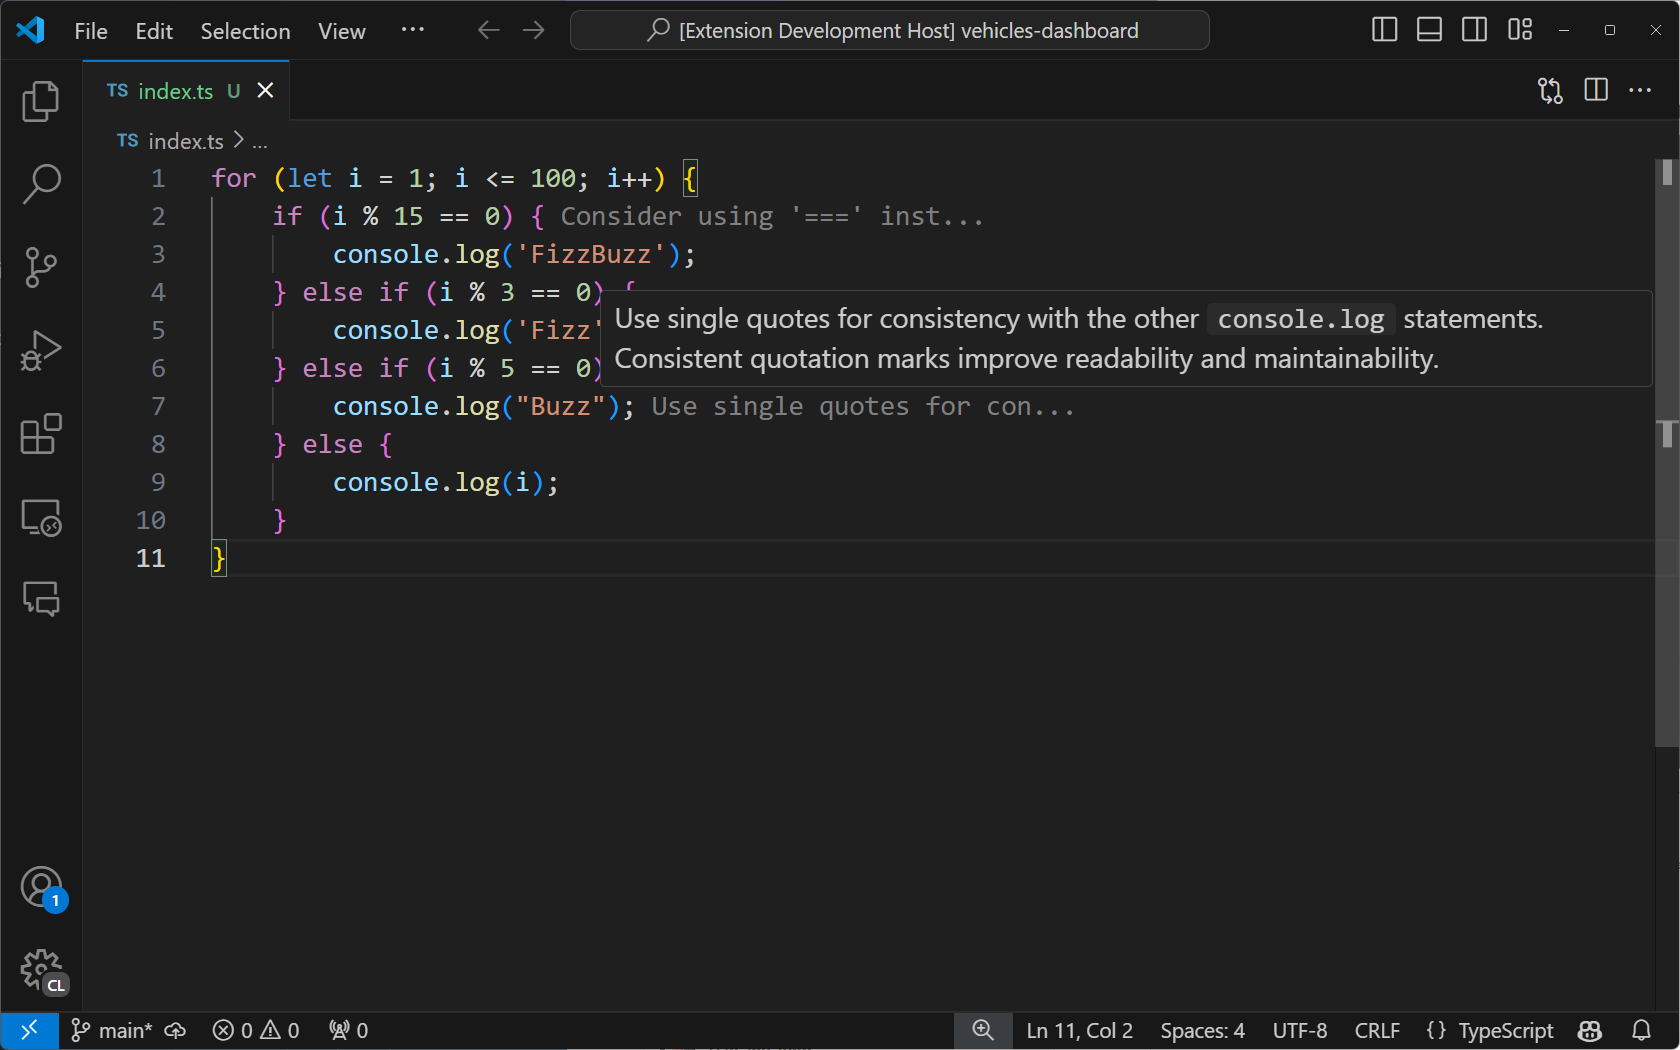
此方法接收从模型解析得到的注释,并使用它创建装饰。首先创建 TextEditorDecorationType 来指定装饰的外观。本例仅添加灰色注释,并将其截断为 25 个字符。用户悬停在消息上时会显示完整消息。
接下来设置装饰出现的位置。它应位于注释中指定的行号,并在该行末尾。
最后,在活动文本编辑器上设置装饰,这会使注释显示在编辑器中。
如果插件仍在运行,请从调试栏选择绿色箭头重启它。如果已关闭调试会话,请按 kbstyle(F5) 运行插件。在打开的新 VS Code 窗口实例中打开代码文件。从命令面板选择 “Toggle Tutor Annotations” 后,应能看到代码注释出现在编辑器中。
向编辑器标题栏添加按钮
可以让命令从命令面板以外的位置调用。本例中,可在当前选项卡顶部添加按钮,让用户轻松切换注释。
为此,请按如下方式修改 package.json 的 “contributes” 部分:
json
"contributes": {
  "commands": [
    {
      "command": "code-tutor.annotate",
      "title": "Toggle Tutor Annotations",
      "icon": "$(comment)"
    }
  ],
  "menus": {
    "editor/title": [
      {
        "command": "code-tutor.annotate",
        "group": "navigation"
      }
    ]
  }
}这样会在编辑器标题栏的导航区域(右侧)显示一个按钮。“icon”来自产品图标参考。
使用绿色箭头重启插件,或者在插件尚未运行时按 kbstyle(F5)。现在应能看到触发 “Toggle Tutor Annotations” 命令的注释图标。
后续步骤
在本教程中,你学习了如何创建使用语言模型 API 将 AI 集成到编辑器中的 VS Code 插件。你使用 VS Code 插件 API 从当前选项卡获取代码,使用自定义提示将其发送给模型,然后使用装饰器在编辑器中解析并显示模型结果。
接下来,可以扩展代码导师插件以包含 Chat 参与者,这样用户就能通过 GitHub Copilot Chat 界面直接与插件交互。还可以探索 VS Code 中完整的 API,发掘在编辑器中构建自定义 AI 体验的新方式。
可在 vscode-extensions-sample 仓库中找到本教程的完整源代码。